Rack::SpyUp
Spying request and json response
Installation
Add this line to your application's Gemfile:
gem 'rack-spyup'
And then execute:
$ bundle
Or install it yourself as:
$ gem install rack-spyup
Usage
use Rack::SpyUp do |config|
  config.logger = Logger.new(STDOUT)
end
spyup command
rack-spyup is shipped with spyup command.
You can use usual config.ru with request and response spyed:
$ spyup config.ru
spyup has the same options as rackup (except --builder),
because she uses Rack::Server internally.
When you use rails
rack-spyup uses railtie system. In rails project, only you must do is just to set your Gemfile:
gem 'rack-spyup'
BTW, if you want to use this middleware only via spyup command, just edit Gemfile:
gem 'rack-spyup', require: false
Which does not enable middleware, and you may use the command bundle exec spyup -p 3000 or like.
Configurations
Rack::SpyUp.config do |config|
  config.logger = Rails.logger # Set your custom logger
  config.enabled_environments = %w(development staging) # Set the rails envs you want to enable in
  # By default this is set to %w(development)
end
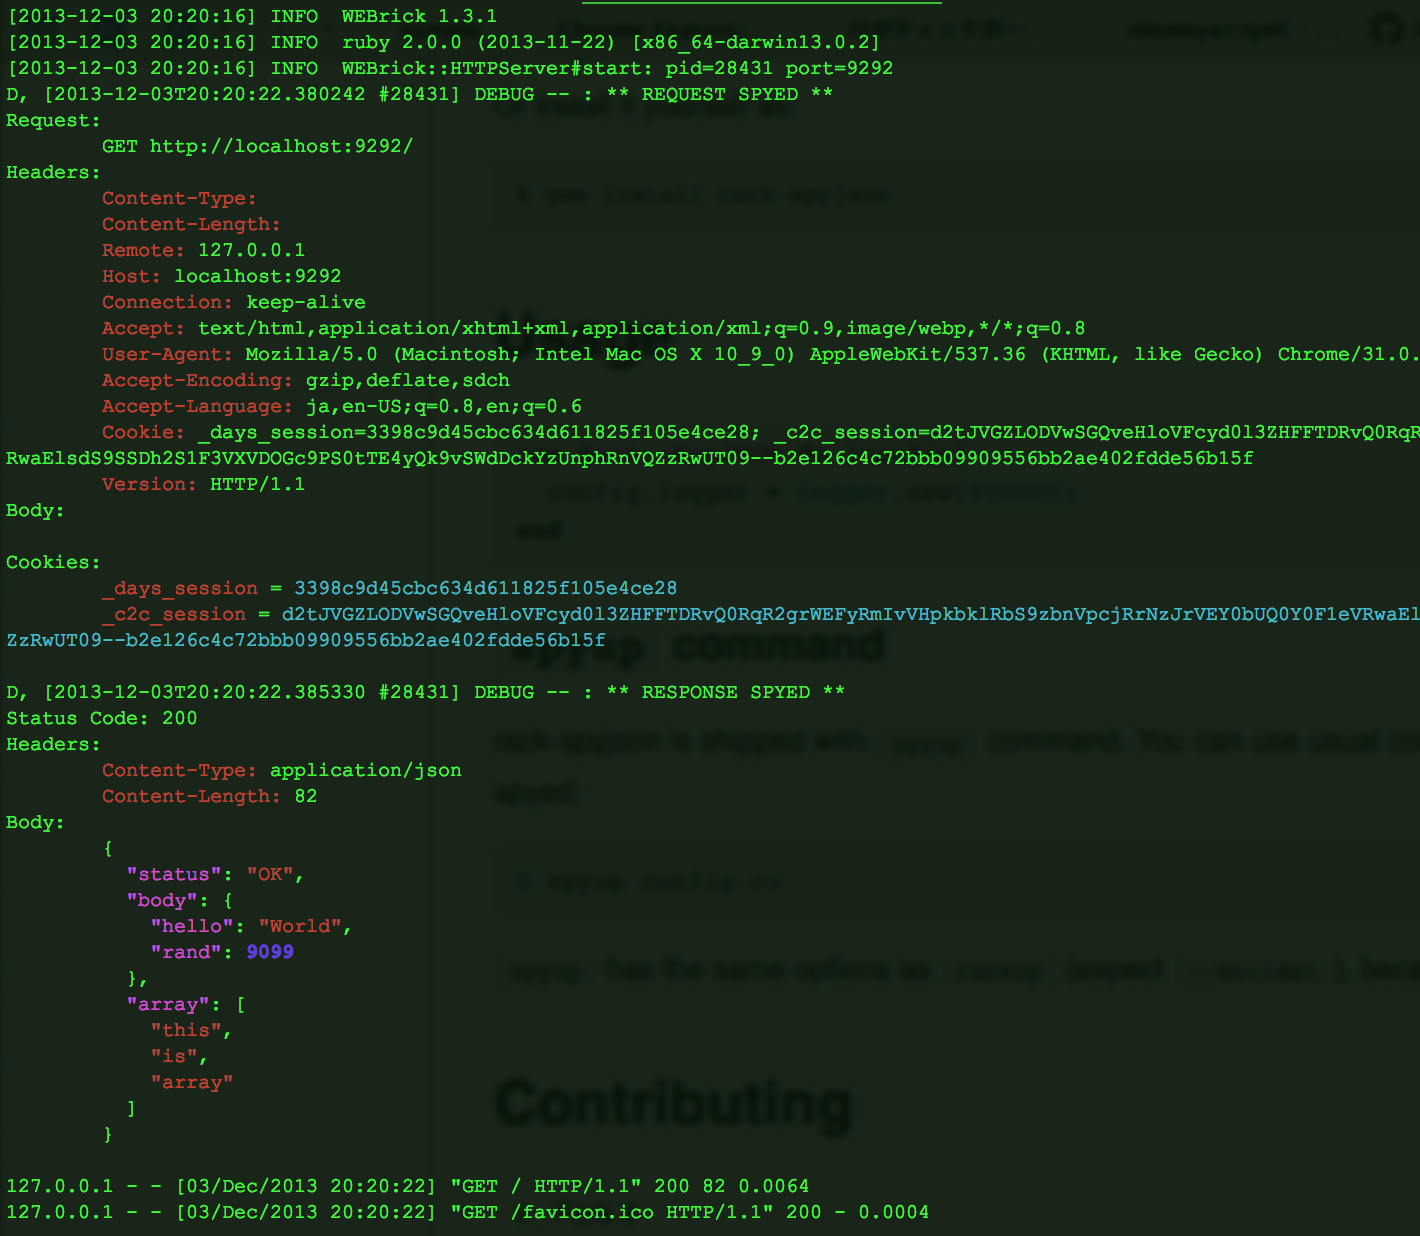
What you will see
Contributing
- Fork it
- Create your feature branch (
git checkout -b my-new-feature) - Commit your changes (
git commit -am 'Add some feature') - Push to the branch (
git push origin my-new-feature) - Create new Pull Request